
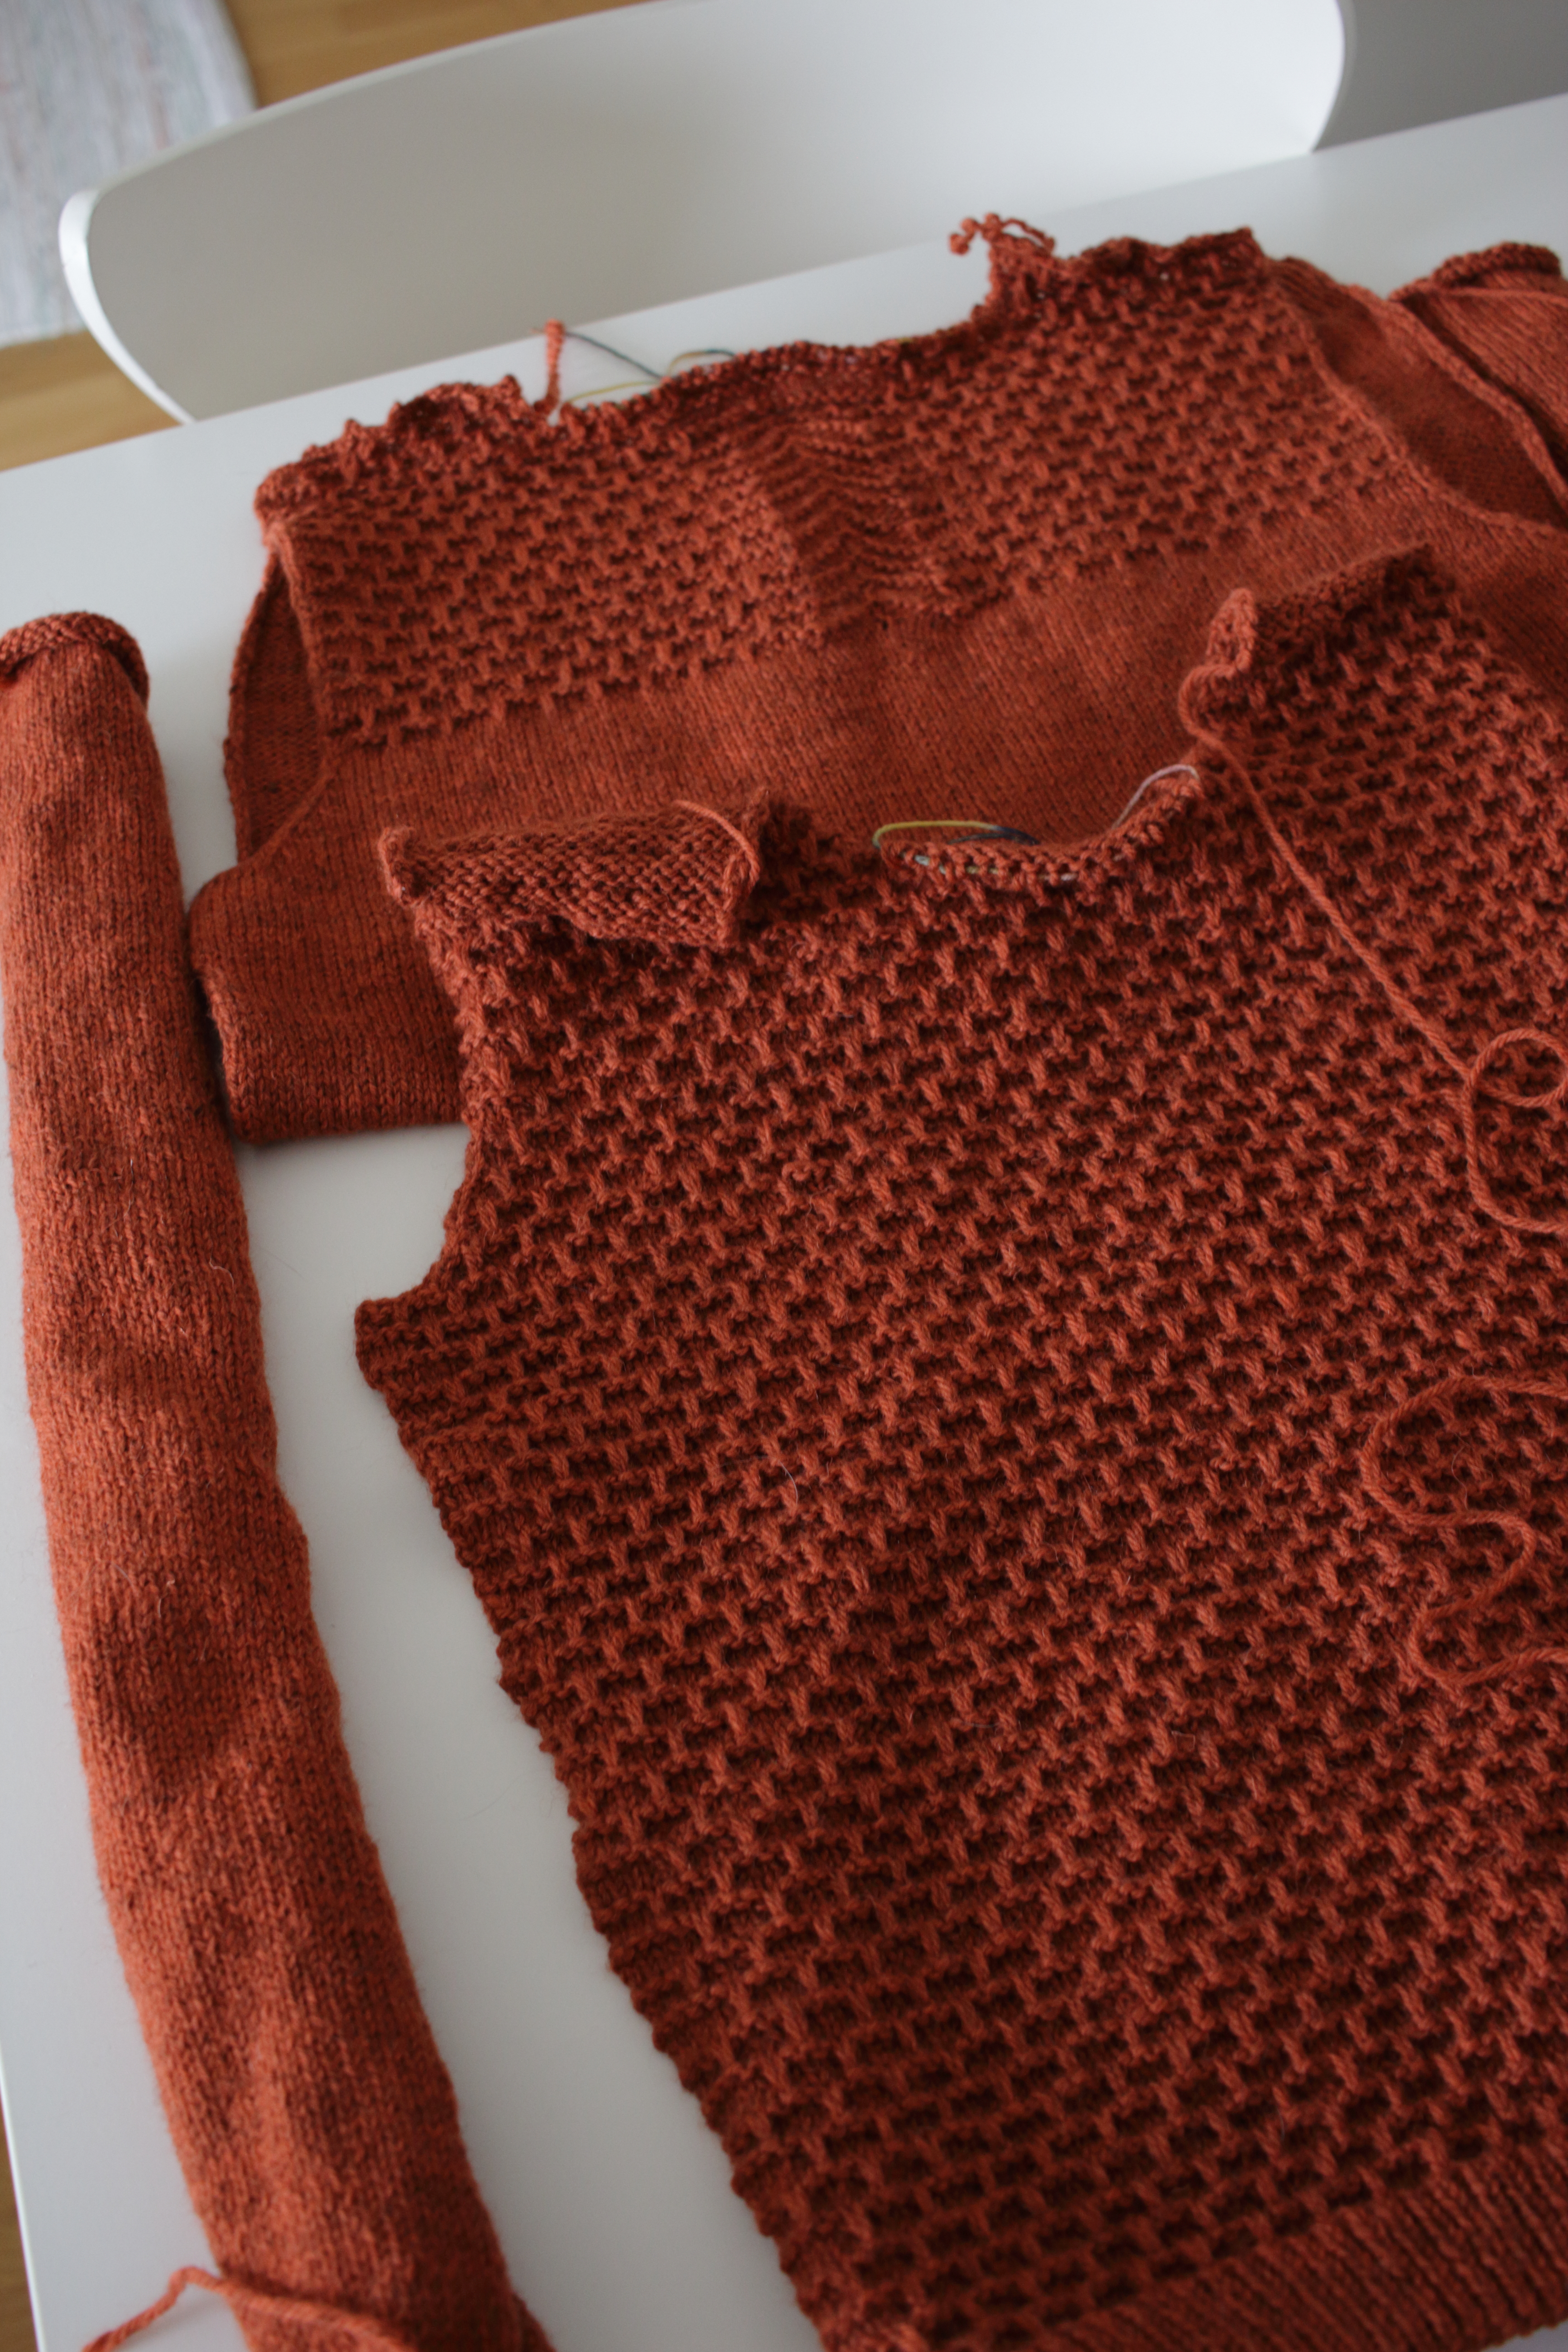
I’ve been thinking about writing a blog post on how to sew a sweater knitted in pieces for a long time, and there’s no better time than the present since the test knit of my newest design is halfway through.
I won’t go into detail on the hand sewing techniques side of the process because I usually sew everything in backstitch. There are plenty of alternatives like mattress stitch, if you prefer an invisible seam, or crocheted seams, among others. I for one, prefer the look of a visible seam.
In my experience the most difficult part of the seaming process is sewing the sleeves to the sweater, so I will focus mostly on that in this blog post.
- Step 0: Block your pieces to the measurements on the pattern. In particular, on my Argila sweater it is easy to overstretch the front piece because the brick stitch is very stretchy. I usually wet block my garments with wool soap like Eucalan or Soak;

-
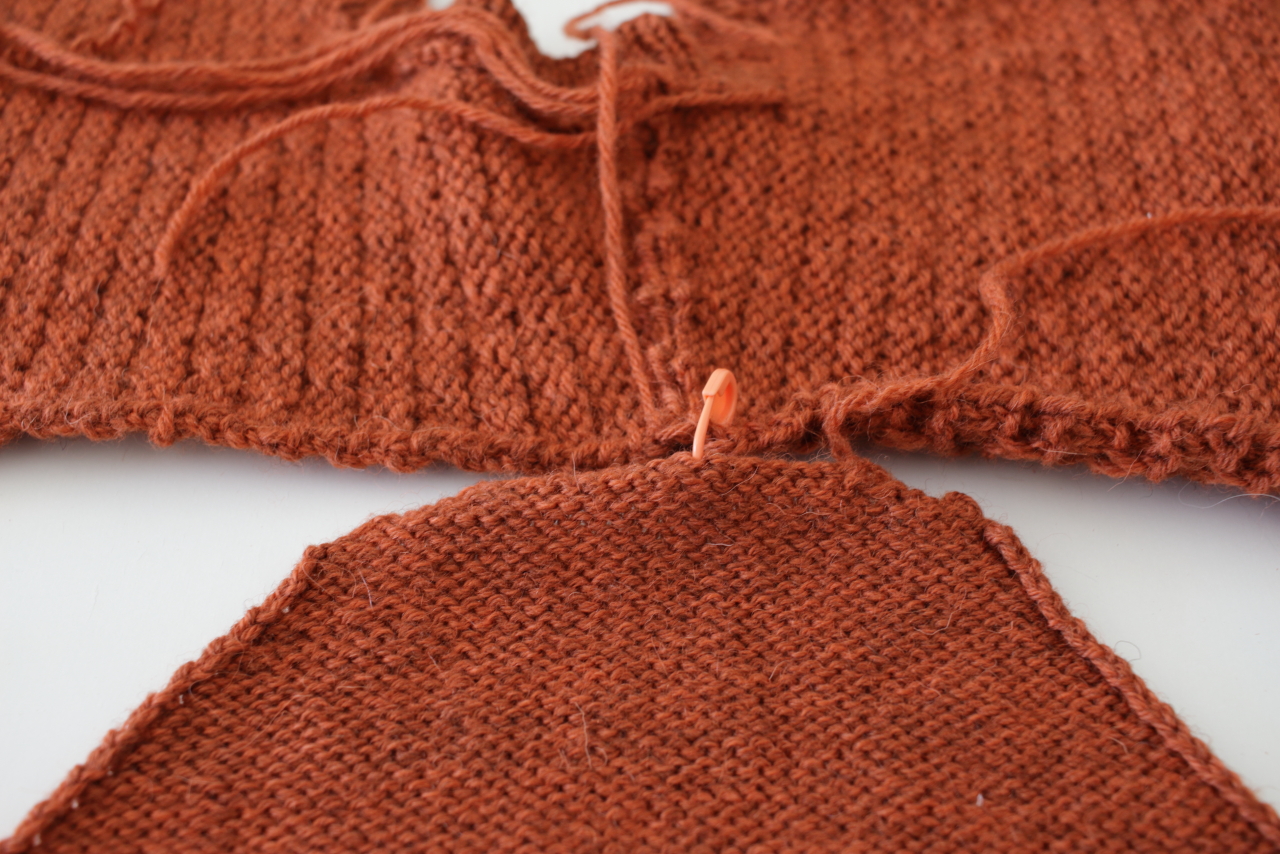
Step 1: Sew the shoulders. They should be exactly the same size and be easy to match;
-
Step 2: Sew the sleeve cap to the sweater:
- 2.1: Identify the middle point on the top the sleeve cap and join that point to the shoulder seam with a locking stitch marker;
- 2.2: Join the edges of the sleeve armhole to the corresponding edges on the front and back pieces with locking stitch markers;
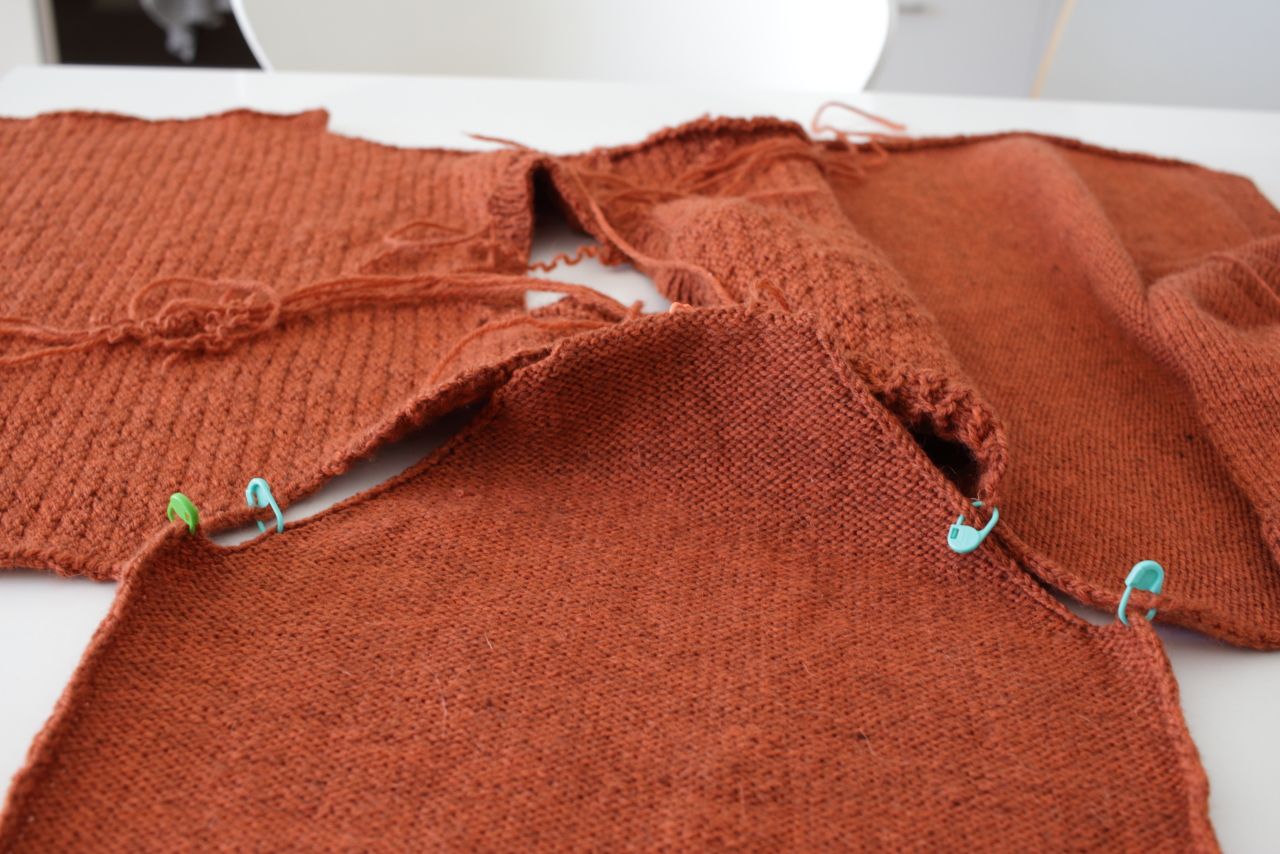
- 2.3: Evenly distribute the remaining sleeve cap fabric to the front and back pieces with locking stitch markers;

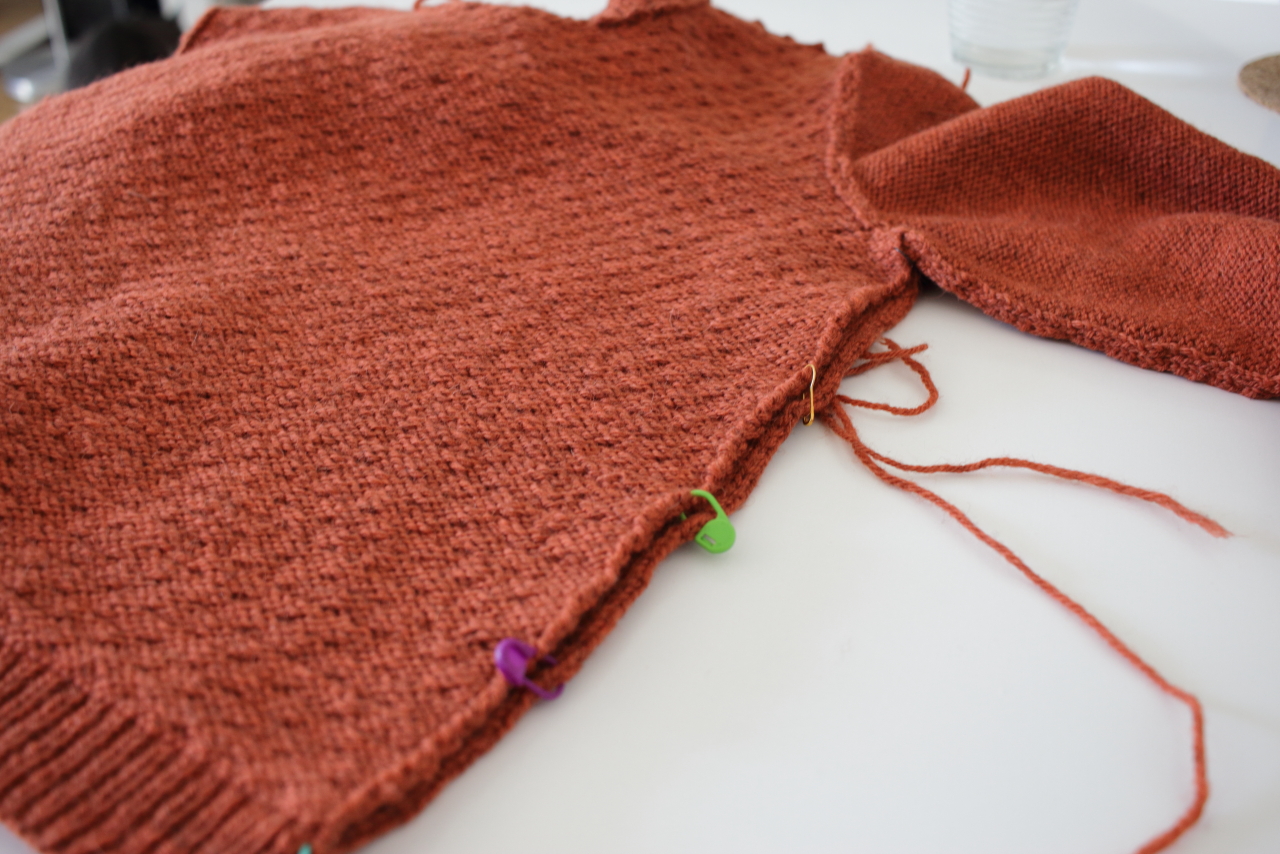
- 2.4: Start sewing the sleeve cap to the sweater starting at the middle point you identified on step 2.1 and leave a long tail. Once you have sewn one side of the sleeve cap, use the long tail to sew the other side.
-
Step 3: Join the sleeve edges with locking stitch markers, matching increases, and sew the sleeve;
-
Step 4: Repeat from step 2 for the second sleeve;
-
Step 5: Join the front and back pieces, matching increases and the beginning of the pieces. On the Argila sweater, even though the increases on the front and back where worked at different rates, their location should be the same due to the difference in gauge;
-
Step 6: Weave in the ends and knit the collar if necessary.
I hope this was helpful and not a blog post like that owl meme.
