intropic

Meyas

Hi, I'm Fabi. I write knitting patterns among other things

dezasseis1

My newest pattern, Dezasseis, is now available on Ravelry!

After a smooth test knit, this might be my fastest pattern release yet. I was a bit disappointed when I realized that I would have to release it as a one size only, but I decided to release as is. The price tag should reflect the pattern’s shortcomings.

I hope someone can still enjoy it!

And thank you to my test knitters! Check out their projects on the project tab of the pattern on Ravelry.

You can find out more about the socks here.

I’ve been thinking about writing a blog post on how to sew a sweater knitted in pieces for a long time, and there’s no better time than the present since the test knit of my newest design is halfway through.

I won’t go into detail on the hand sewing techniques side of the process because I usually sew everything in backstitch. There are plenty of alternatives like mattress stitch, if you prefer an invisible seam, or crocheted seams, among others. I for one, prefer the look of a visible seam.

In my experience the most difficult part of the seaming process is sewing the sleeves to the sweater, so I will focus mostly on that in this blog post.

  • Step 0: Block your pieces to the measurements on the pattern. In particular, on my Argila sweater it is easy to overstretch the front piece because the brick stitch is very stretchy. I usually wet block my garments with wool soap like Eucalan or Soak;

beforeblockingafterblocking

  • Step 1: Sew the shoulders. They should be exactly the same size and be easy to match;

  • Step 2: Sew the sleeve cap to the sweater:

    • 2.1: Identify the middle point on the top the sleeve cap and join that point to the shoulder seam with a locking stitch marker;
    middleofsleeve
    • 2.2: Join the edges of the sleeve armhole to the corresponding edges on the front and back pieces with locking stitch markers;
    armhole
    • 2.3: Evenly distribute the remaining sleeve cap fabric to the front and back pieces with locking stitch markers;
    sleevecap
    • 2.4: Start sewing the sleeve cap to the sweater starting at the middle point you identified on step 2.1 and leave a long tail. Once you have sewn one side of the sleeve cap, use the long tail to sew the other side.
  • Step 3: Join the sleeve edges with locking stitch markers, matching increases, and sew the sleeve;

  • Step 4: Repeat from step 2 for the second sleeve;

  • Step 5: Join the front and back pieces, matching increases and the beginning of the pieces. On the Argila sweater, even though the increases on the front and back where worked at different rates, their location should be the same due to the difference in gauge;

    sides
  • Step 6: Weave in the ends and knit the collar if necessary.

I hope this was helpful and not a blog post like that owl meme.

owl

This blog post is a continuation of post Solving a quilt puzzle: Part 1.

According to the plan I delineated in Part 1, I should now attribute a color to each number I used on the previous section.

I was planning on using a Robert Kaufman roll-up (more on it in Part 1), and on Robert Kaufman’s website you can see a picture of the fabric for each color on the roll. I screenshot it and got the RGB color values for each fabric with Gimp. Now I needed to tell Racket what my colors were.

I compiled a list of colors like so:

(define c1 (make-color 246 246 248))
(define c2 (make-color 245 243 231))
(define c3 (make-color 246 246 236))

And did the same for all 38 colors.

This was my range of colors:

rangeofcolors

I could finally start thinking in triangles. In Racket painting and drawing a triangle is as simple as:

;; draw a equilateral triangle, length 40, and paint it with color red 
(triangle 40 "solid" "red")

All that was left to do was to draw the triangles, and have each triangle get its color from the same index on the matrix we got on Part 1. At the same time, I would rotate every other triangle 180°, and rotate the triangles on the next row in opposite order.

;; list of colors defined by me 
(define rangeofcolors (vector c1 c2 c3 c4 c5 c6 c7 c8 c9 c10 c11 c12 c13 c14 c15 c16 
c17 c18 c19 c20 c21 c22 c23 c24 c25 c26 c27 c28 c29 c30 c31 c32 c33 c34 c35 c36 c37 
c38))

;; draw equilateral triangle, length 40, color x
(define (givecolor x)
  (triangle 40 "solid" x))
;; draw and rotate 180° equilateral triangle, length 40, color z
(define (givecolor180 z)
  (rotate 180 (triangle 40 "solid" z)))

;; get a matrix of 26 rows from Part 1
(define quilt (paint_n_rows 26))

;; paint triangles, but rotate them on [odd rows and even index of quilt] 
;; and on [even rows and odd index of quilt] 
(define (colorit anyquilt j i)
  (if (odd? j)
      (if (odd? i) 
          (givecolor (vector-ref rangeofcolors (vector-ref (list-ref anyquilt j) i))) 
          ;;else
          (givecolor180 (vector-ref rangeofcolors (vector-ref (list-ref anyquilt j) i)))) 
    ;;else
    (if (odd? i) 
       (givecolor180 (vector-ref rangeofcolors (vector-ref (list-ref anyquilt j) i))) 
       ;;else
       (givecolor (vector-ref rangeofcolors (vector-ref (list-ref anyquilt j) i)))))) 

;; save image (copied straight from stackoverflow ;))
(define (save-pict the-pict name kind)
  (define bm (pict->bitmap the-pict))
  (send bm save-file name kind))

;; bringing it all together
(define (print-all-pretty)
  ;; 
  (let ([result (for/fold ([rows (blank)]) ([j (length quilt)])
     ;; draw a new picture with each row of triangles 
     (vc-append
      (for/fold ([row2 (blank)]) ([i (vector-length (list-ref quilt j))])
        ;; draw a new picture of row of each triangle in the specified color
        ;; and remove white space between triangles
        (hc-append -20 (colorit quilt j i) row2))
      rows
      ))])
        (begin
          (print result)
          ;; crop image to remove half a triangle on the side edge and save it 
          (save-pict (crop 20 0 880 1040 (pict->bitmap result)) "triangles.png" 'png)
        )))

And this is the final result:

finalresult

I’m in love with it. As soon as I saw the result I ordered the fabric.

I feel like I should say something about Racket, but since I can’t compare it with anything else due to my lack of experience, my review is pretty much meaningless. Here it goes: I think it wasn’t too hard to understand the syntax, although at times it felt like I was lost in a sea of parentheses. The documentation is extensive and if I ever need to do something similar, I won’t hesitate to use Racket again. (By the way, my husband is in love with Racket.)

As for the quilt, in the near future I will have to mess around with the maximum number of triangles and the number of colors, because after receiving the fabric in the mail I realized I had made a couple of mistakes. First, each strip only yields 27 triangles instead of 31 (due to the selvedges); second, the roll has 4 extra colors in addition to the 37 displayed on the manufacturer’s website. But it should be fine.

I plan on continuing to write updates, but this time on actually sewing the quilt, which is more in line with the content of this blog.

Right now I’m cutting the triangles and beginning to get a sense of just how long this project will take.

fotoinstagramquilt

This was fun and I hope it helps someone in the future.

Solving a quilt puzzle: Part 1

Triangles, rectangles, numbers

Before we get to the meat of the matter, followers of this blog beware: the next couple of posts will be different than what I usually share on this space, and will contain no knitting whatsoever.

I have wanted to make a quilt ever since I started sewing and Purl Soho’s Little Peaks Quilt pattern was exactly the sort of quilt that I was looking for. The only problem with the pattern is that there isn’t exactly a color plan before you start sewing, and you are expected to pick “any 2 triangles” at random.

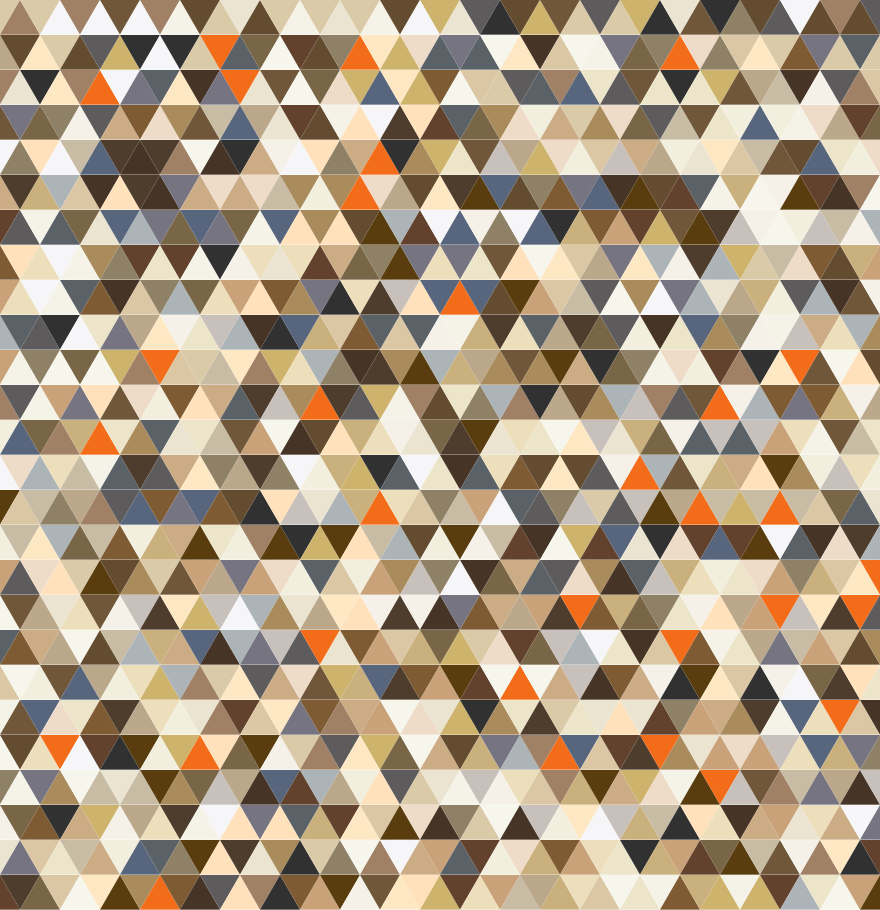
Their sample is absolutely beautiful:

littlepeaks

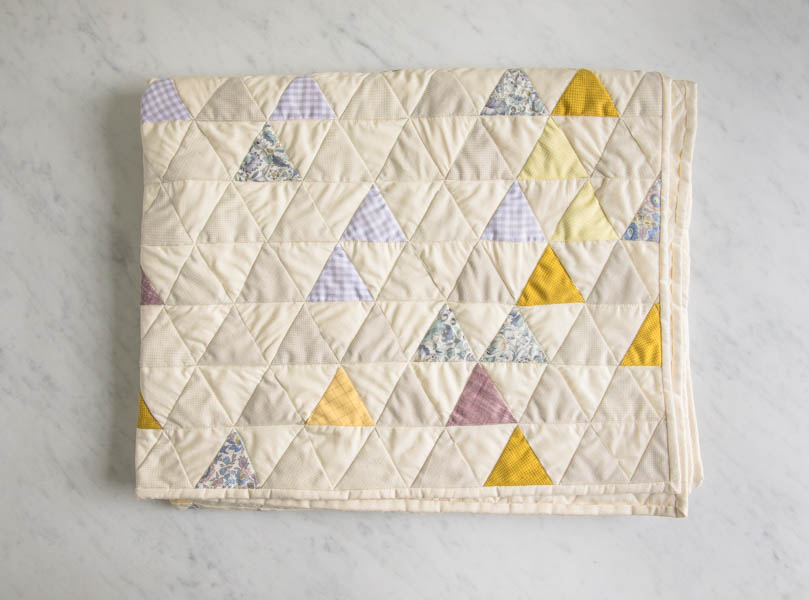
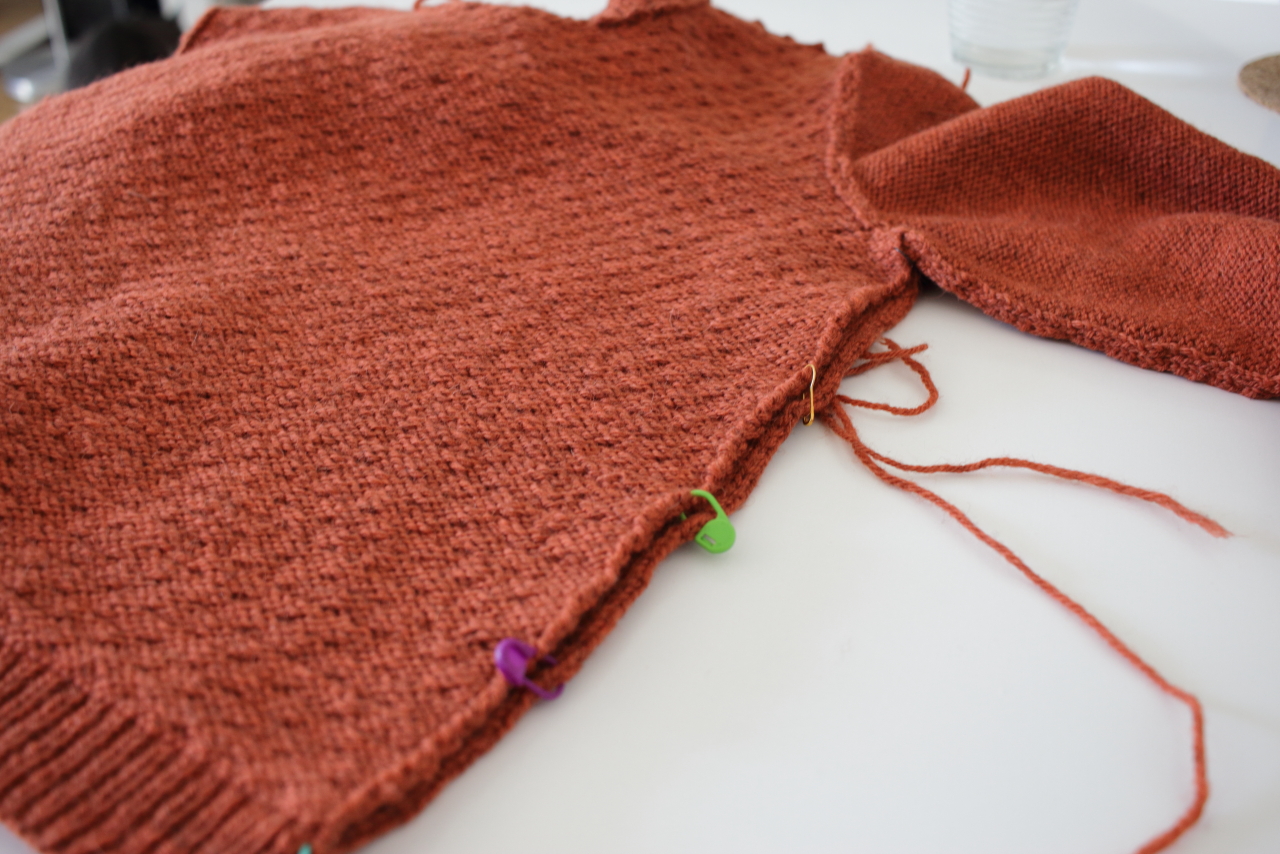
However I wanted to use very different colored fabrics and I would never start such a large project without making sure that I would like my version.

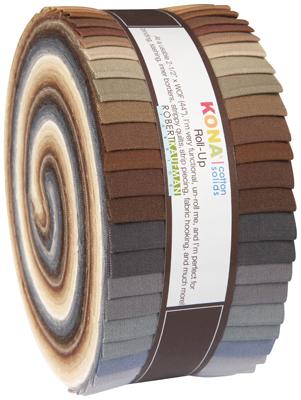
While I was still playing around with the idea of making a quilt, I went looking for fabric and discovered that you can buy strips of pre-cut fabric in a big roll of matching colors! I was looking for dark and mute colors, with a pop of color. I ended up selecting a Robert Kaufman Kona Neutrals Palette 2-1/2" Roll-Up and 1 extra fat quarter in the color Kumquat.
roll

The plan was to follow the instructions for the pattern mentioned above, but to follow my own color scheme, which as opposed to the original pattern doesn’t have one solid color that gets repeated every other triangle.

Instead I would have 37 colors from the roll up, plus the orange. Each color/strip of the pre-cut fabric would yield 31 equilateral triangles of 6.35cm in length; the orange fat quarter would also yield at least 31 triangles of the same size. So in total I would have 38 x 31 = 1178 triangles. Now I would have to determine the placement of each different colored triangle, in no specific order, except that I didn’t want to have 2 triangles of the same color sewn next to each other (neither to the sides nor on the row above or below). I didn’t care about the vertices, only the sides.
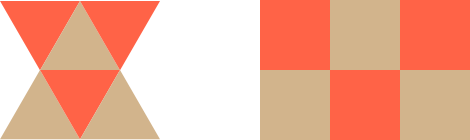
This was fine:

triangle

This is what I was trying to avoid:

trianglex

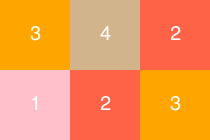
Since I was ignoring the vertices, I realized that I could think in terms of rectangles and achieve the same result.

trianglerectangle

The rectangles simplified everything in mind and the next logical step was to think in numbers instead of colors. I would look for a solution in numbers and attribute a color to each number later on.

rectanglenumbers

The next step was to determine the width and length of the quilt in triangles. I decided to have 22 triangles in width and 26 in height, or about 139cm x 165cm (after sewing it will be smaller than this due to the seam allowances). But the horizontal lines of triangles would actually use double the amount of triangles needed to determine the width, so I would need 44 x 26 = 1144 triangles in total.

With this information the problem I was trying to solve turned out to be: arrange sequences of numbers 1 to 38, in a matrix of [26 x 44], so that each number is never repeated either to the sides or in the rows above or below, and so that each number is never used more than 31 times.

From the beginning I felt that the easiest way to solve this would be with programming. My husband works in IT and from time to time tries to convince me to try a programming language that he thinks would suit me. He had been raving about Racket for a while, because I could draw stuff with it. I finally looked it up and the drawing aspect of it did seem pretty straight forward (notice the pretty drawings above). But I had some work to do before getting to the drawing bit.

As for my programming experience, I attended a course in Introduction to Programming in college where we worked in R and later I took a class in Python on Coursera. So I had no idea what I was doing (still don’t), but just had a vague idea that making a loop somehow would solve the problem. Let’s just say that my husband was a huge help, specially for going from one vector to a matrix. Neither my husband nor I had any experience with Racket, so this might not be the most idiomatic code.

Setting it up:

;; dictionary that keeps track of the number of time a color was used
(define colors_count (make-hash))

;; maximum number of times a color can be used
(define MAX_COLOR_COUNT 31)

;; number of colors available 
(define MAX_COLORS 38) 

;; set all colors 1-38 to 31 available units on the dictionary
(for ([i MAX_COLORS]) 
(dict-set! colors_count i MAX_COLOR_COUNT))

;; start a vector 44 in length 
(define row (build-vector 44 values)) 

;; first non colored row
(define NO_COLOR -1)
(define dummy (build-vector 44 (lambda (x) NO_COLOR)))

Work on picking colors making sure our condition is met:

;; pick a random color that still has available units on the dictionary
(define (random_color) 
  (let ([color (random (dict-count colors_count))]) 
    (while #t
           (set! color (random (dict-count colors_count))) 
           (let ([color_count (hash-ref colors_count color)]) 
             (when (> color_count 0) 
                 (break))))
    color))

;; update the units available for each color 
(define (updatedictionary color) 
   (dict-set! colors_count color (- (hash-ref colors_count color) 1)))

;; true if c1 is different from c2 and c3
(define (differ c1 c2 c3) 
  (and (not (equal? c1 c2))
       (not (equal? c1 c3))))

;; select a color that is different from the previous selected color 
;; and different from the color on the same index on the row below
(define (selectcolor previous_color below_color) 
  (if (and (equal? previous_color NO_COLOR) (equal? below_color NO_COLOR))
      (begin
        (updatedictionary (random_color))
        (random_color))
      ;; else
      (begin
        ;;continue looking for a color until it finds one that is different
        ;;from the previous color and the color on the same index on the row below
        (let ([generated_color (random_color)])
          (while (not (differ generated_color previous_color below_color)) 
                 (set! generated_color (random_color)))
              (updatedictionary generated_color)
              generated_color
              ))))

Create the matrix and print the result:

;; fills a vector with colors provided by the selectcolor function, 
;; taking into account the colors on the row below 
(define (paint_row below_row)
  (let ([row (build-vector 44 values)])
    (for ([i (vector-length row)]) 
      (let ([below_color (vector-ref below_row i)])
        ;; for i=0, there isn't a previous color 
        (if (equal? i 0)
            (begin
              (vector-set! row i (selectcolor NO_COLOR below_color))
              (display (~r (vector-ref row i) #:min-width 2 #:pad-string "0"))
              (display " ")
              )
            ;; else
            ;; looks for the previous color on index i-1 of vector row, 
            ;; and selects a new color considering also the color below
            (begin
              (let ([previous_color (vector-ref row (- i 1))])
                (let ([picked_color (selectcolor previous_color below_color)]) 
                  (display (~r picked_color #:min-width 2 #:pad-string "0"))
                  (display " " )
                  (vector-set! row i picked_color)  
                  ))))))row))

;; paints n rows and prints the result 
(define (paint_n_rows n)
  (let ([result (list)]) 
    ;; paints the first row and appends it to the result list
  (let ([previous_row (paint_row dummy)]) 
    (set! result (append result (list previous_row)))
    (display "\n")
    ;; continues painting to n-1 and appends the results to the result list
    (for ([i (- n 1)]) 
      (begin
        (set! previous_row (paint_row previous_row)) 
        (set! result (append result (list previous_row)))
        (display "\n")
        )))
    result))

While going through the code and writing the comments for this post, I realized that I probably only wrote half of it. Without the help of my husband it would have taken me weeks or months to figure this out.

But here we are and, for example, the result of (paint_n_rows 4) looks like this:

31 36 33 29 28 02 11 12 33 15 03 08 30 02 37 11 21 26 19 36 27 11 09 07 15 09 14 35 26 36 12 19 21 24 12 20 30 34 32 30 14 15 26 29

11 04 07 00 06 14 17 06 14 12 37 24 21 30 31 25 29 15 25 03 07 01 14 03 14 36 24 08 33 17 02 24 02 08 00 01 02 03 08 24 10 07 32 33

34 17 13 07 33 20 13 18 26 16 06 36 10 32 25 00 12 09 16 07 26 22 01 14 02 27 10 13 22 16 17 13 37 23 30 02 11 24 28 16 01 17 29 01

19 29 37 18 37 30 04 32 21 11 24 34 21 16 20 26 17 26 18 28 33 09 10 12 19 23 12 37 01 33 08 03 11 01 23 28 00 03 32 12 13 24 02 04

Now that the hard part was done, I could finally start messing around with coloring triangles in Racket.

This post is getting huge, so this is Part 1. I will continue on Part 2.

Arquivo

Search

About

Here you can read about my designs, as well as tips and modifications to my patterns. If you speak Portuguese you can also find me on Youtube as Meyas Podcast. And of course I am on Ravelry! Click on the Ravelry icon above or search for apionese.

meyasdesigns